


This year's printable calendar style is a little different than in the past because it's created from my floral painting sketches and lettering. I had fun putting it together for you and I hope it makes you smile throughout the year. Download below and enjoy!


How to Draw a Wreath
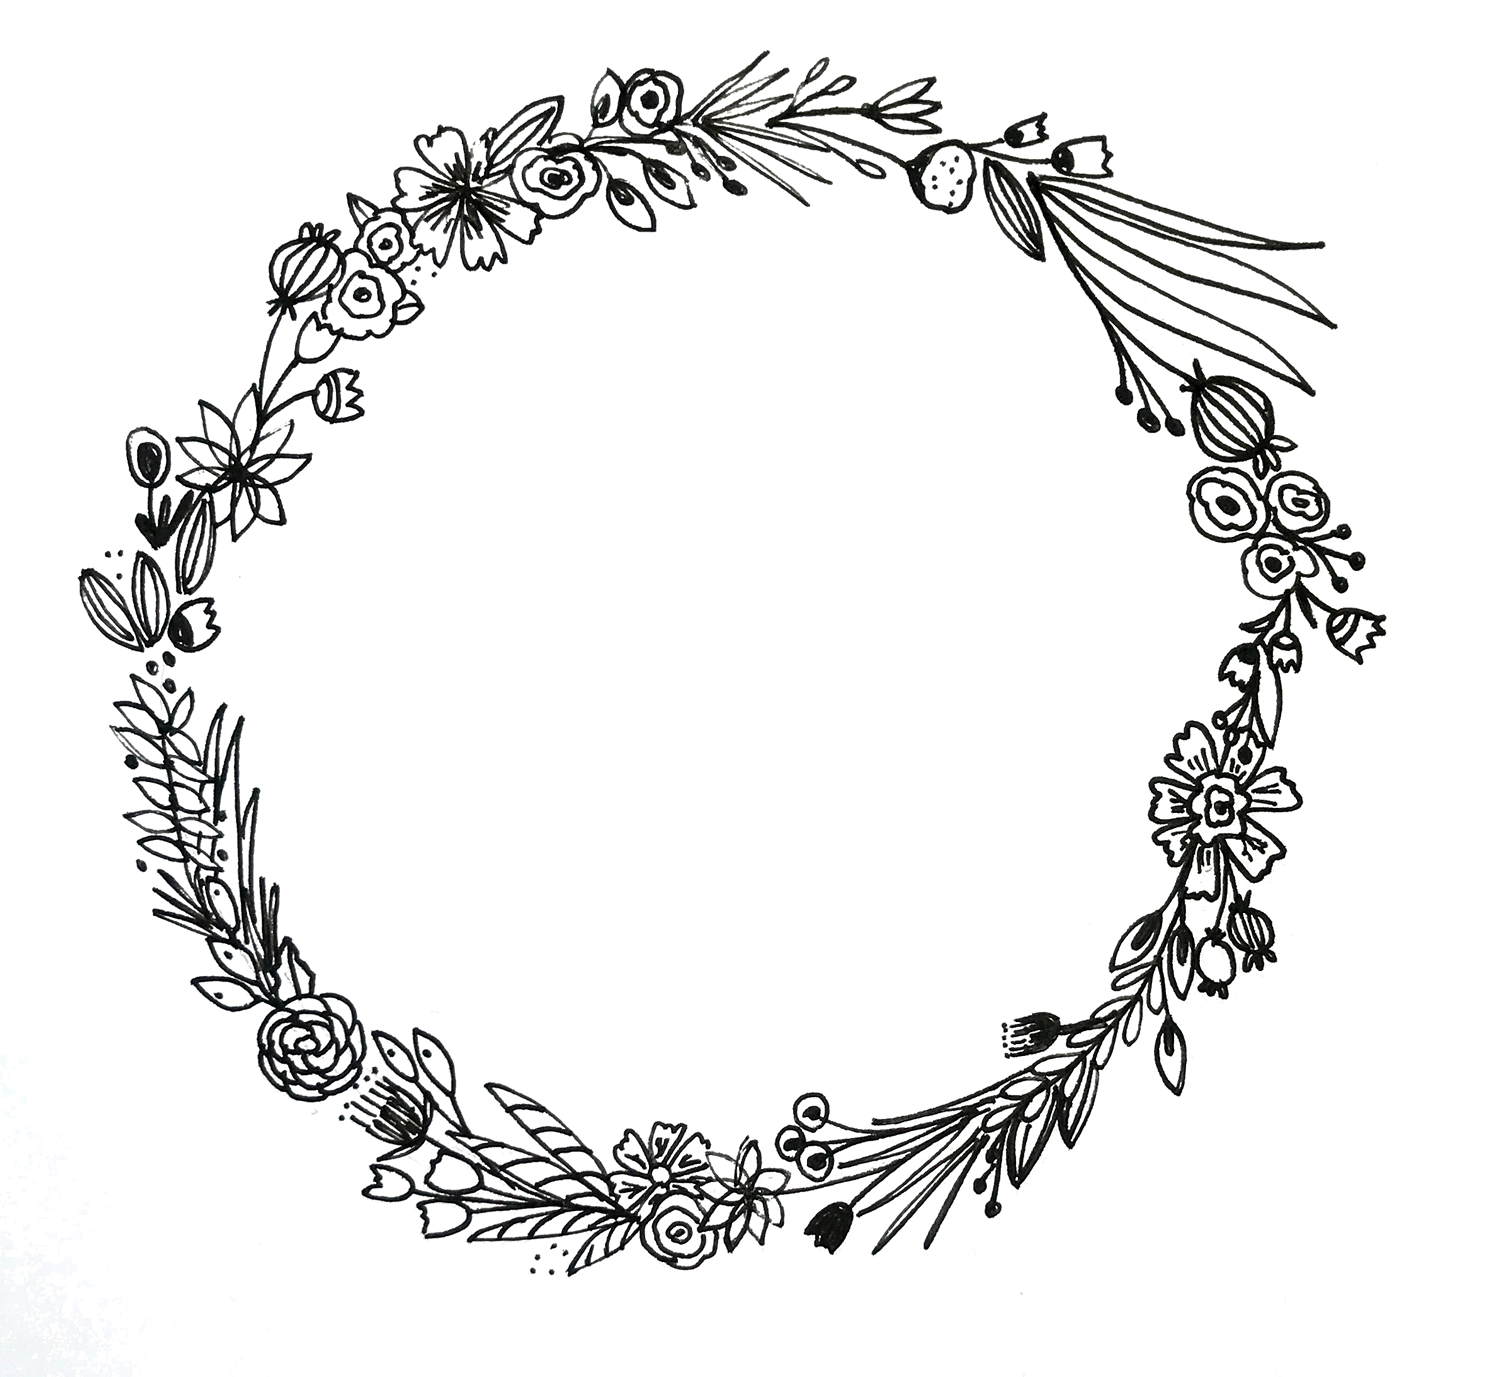
Wreaths! I am so glad I came across Surely Simple's Instagram account the other day because it inspired me to turn the floral motifs I sketch into wreaths. Pen and ink wreaths. It's an addicting activity and believe me when I say they look more intricate and difficult to draw than they actually are. The process is a lot of fun and I'm going to show you how to make one because I think you'll enjoy it!
What you'll need:
• Paper
• Pen (I use micron pens but any will do)
• Pencil
• Something round for tracing
Start by sketching a few leaves and flowers which will give you something to reference as you create your wreath. I like to have motifs readily available to pull from so I don't have to overthink (which I'm prone to do). It also helps me move a little faster because I don't need to stop every few leaves to figure out what other elements I should add.

Next, use a pencil to trace a round item such as a mug, jar, or whatever you have on hand.
Now use your pen and start drawing!
Start slowly and draw each motif, one by one. Try not to overthink (like I did my first few times) and instead, use your reference page to pull items and go around the ring. You can always fill in blank areas with dots or small leaves or florals after you fill the wreath once. If you're like me, you'll analyze your wreath like crazy so go ahead and take the time to learn from your first couple attempts and you'll keep getting better...I'm sure of it! Consider the following:
Spacing - Is there an area of the wreath where you have a bunch of motifs tight and squished together and other areas that are more sparse? Consider working on the spacing of your elements.
Balance - Mix the bold elements with the more delicate elements and consider the size of each motif. If some are extra large and others are small, make sure the large elements are dispersed around the wreath so it doesn't feel extra "heavy" in one area, making it seem off-balanced.
Visual Interest - do you have too many of the same elements in one section of the wreath? Is there variation between your motifs? Sometimes using all the same elements looks amazing and is just what you're going for, but make sure it looks intentional and that you try a mixture of shapes and angles around the wreath to keep the eye from settling on one overwhelming area.
Have fun!
Links
A 45-second video of me drawing a floral wreath
Surely Simple's Instagram
Free Download: Floral Gift Tags
Happy Friday! Here are some cute notecards in navy and rose gold for you to print and use to your heart's content. They're ready to cut and can even be used as a little note card.

Here are a few ways I like to use gift tags:
• Put on top of a gift box (obviously)
• Write a quick thank you and slip into a bag when I'm returning something to a friend
• Stick onto a sweet treat that I'm giving to a special friend
• Put a love note in my husband's backpack when he goes on a guys trip
• If my kids were old enough I'd add notes in their school lunches
What I'm Learning: Drawing Pens
When you follow artists on Instagram or YouTube, or take online workshops from creatives, you'll see there are a few brands of pens recommended over and over again. I regularly hear about Microns, Uni, and Faber-Castell.
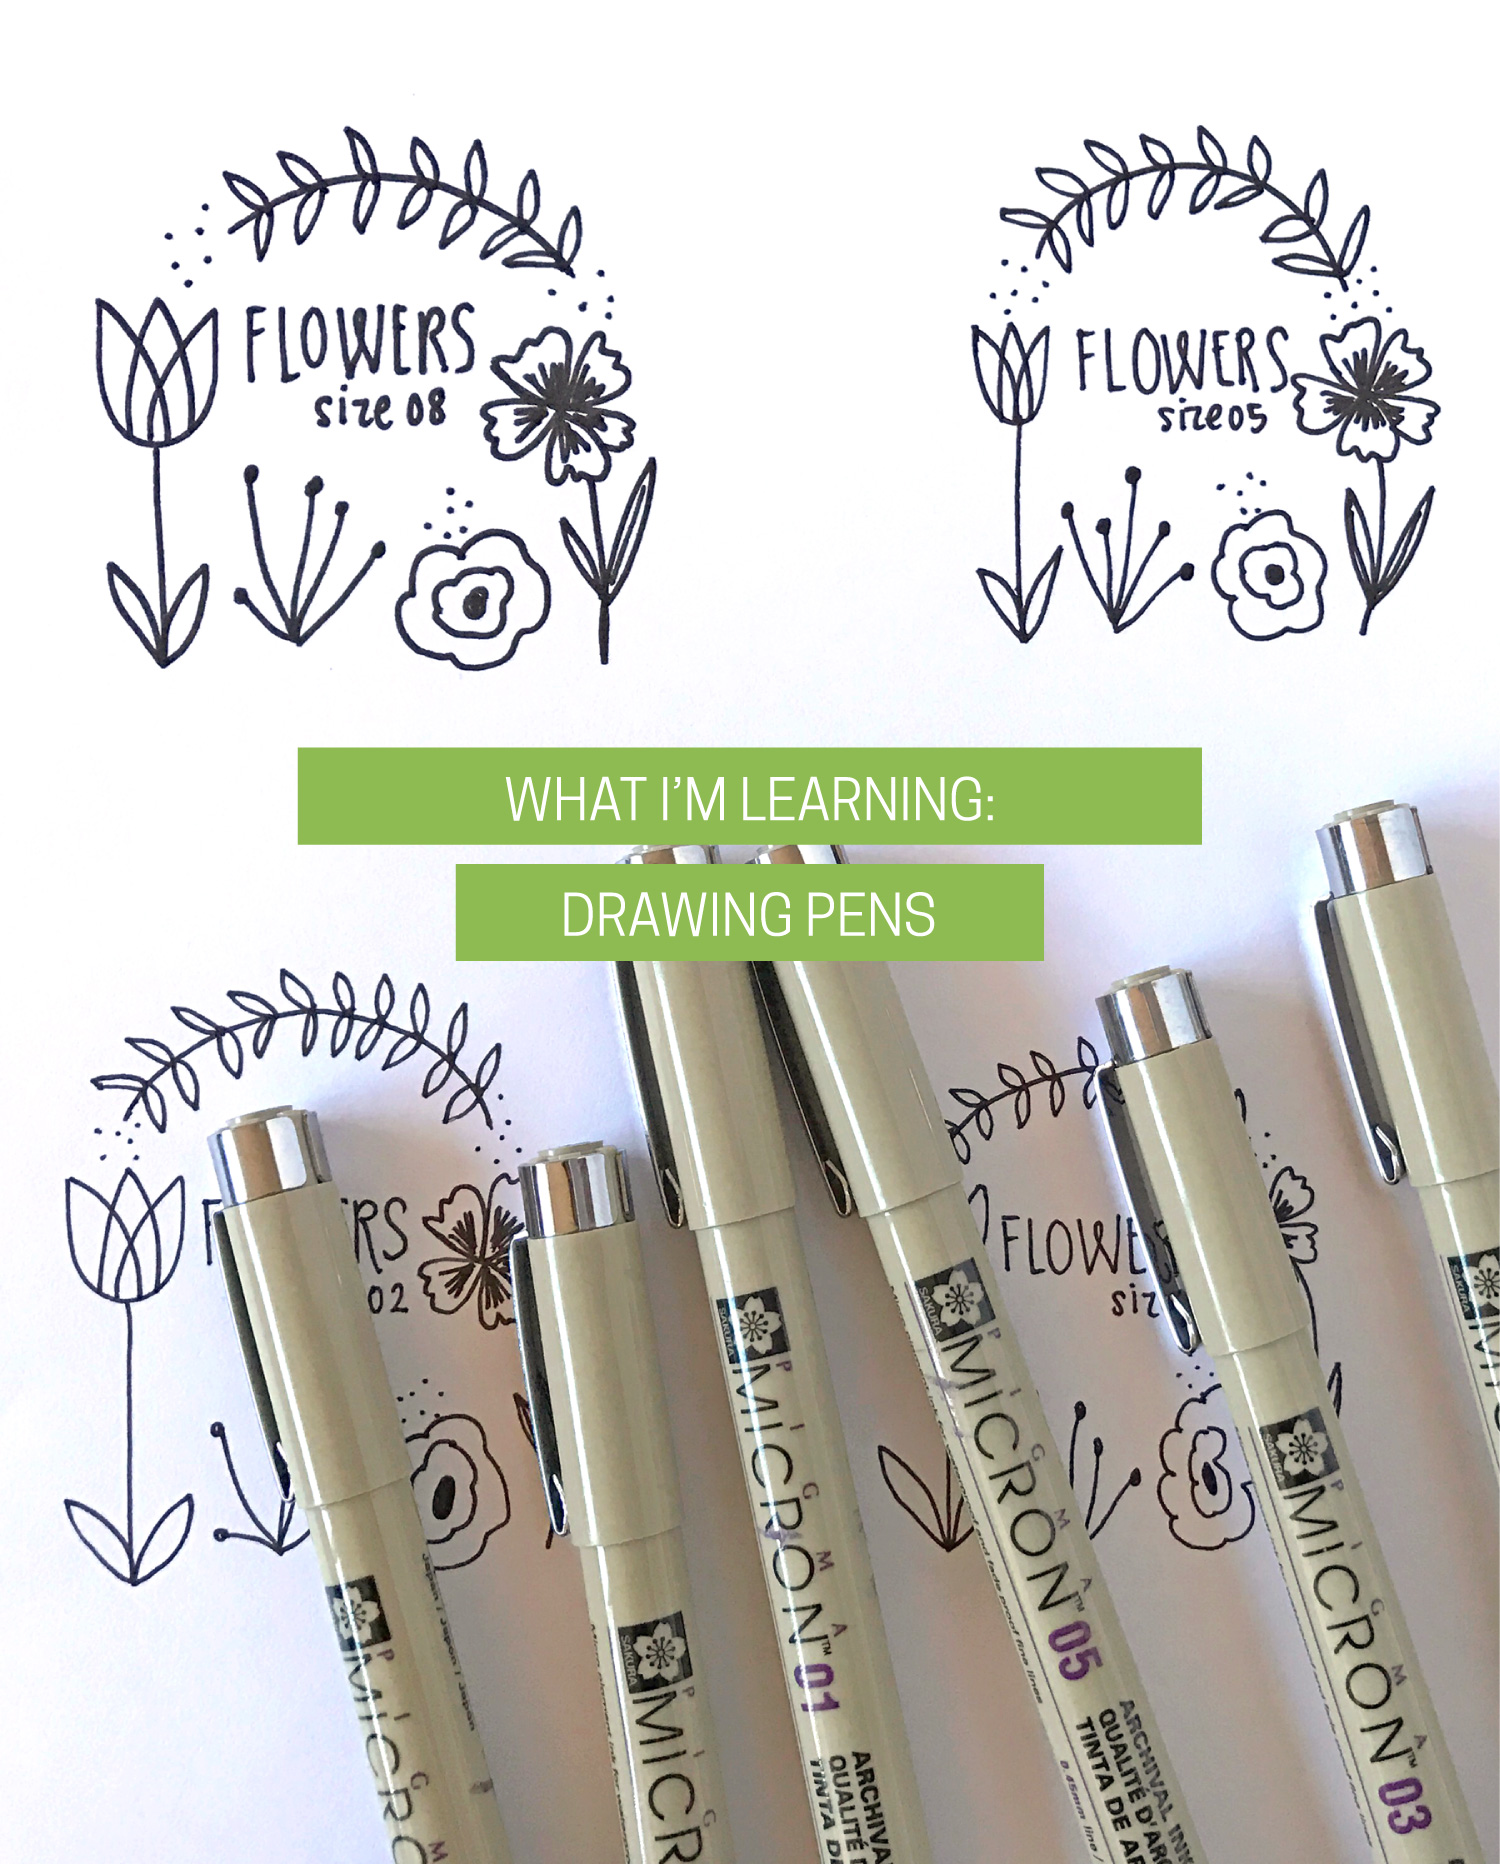
While every artist has their preference, I've been using the Micron Pens because it's what I have on hand—and so far I haven't had a reason to try another brand. They come in a variety of sizes, feel comfortable in my hand and make smooth lines. Maybe as they start drying out I will give another brand a try, just to compare.
I have the following sizes which came together in one pack: 005, 01, 02, 03, 05, 08, 1, and Brush.
The recommendation Lisa Congdon gives in her line art class on Creativebug is to start with a larger tip for more control as you're learning: size 08 or 05. Each size can each be used for different things: 01 for small details, 08 for filling in areas that need to be fully black, etc. but lately I've been gravitating towards the thinner tips when I sit down to draw. There's a daintiness and simplicity the thinner tips give that I like...at least for now :)
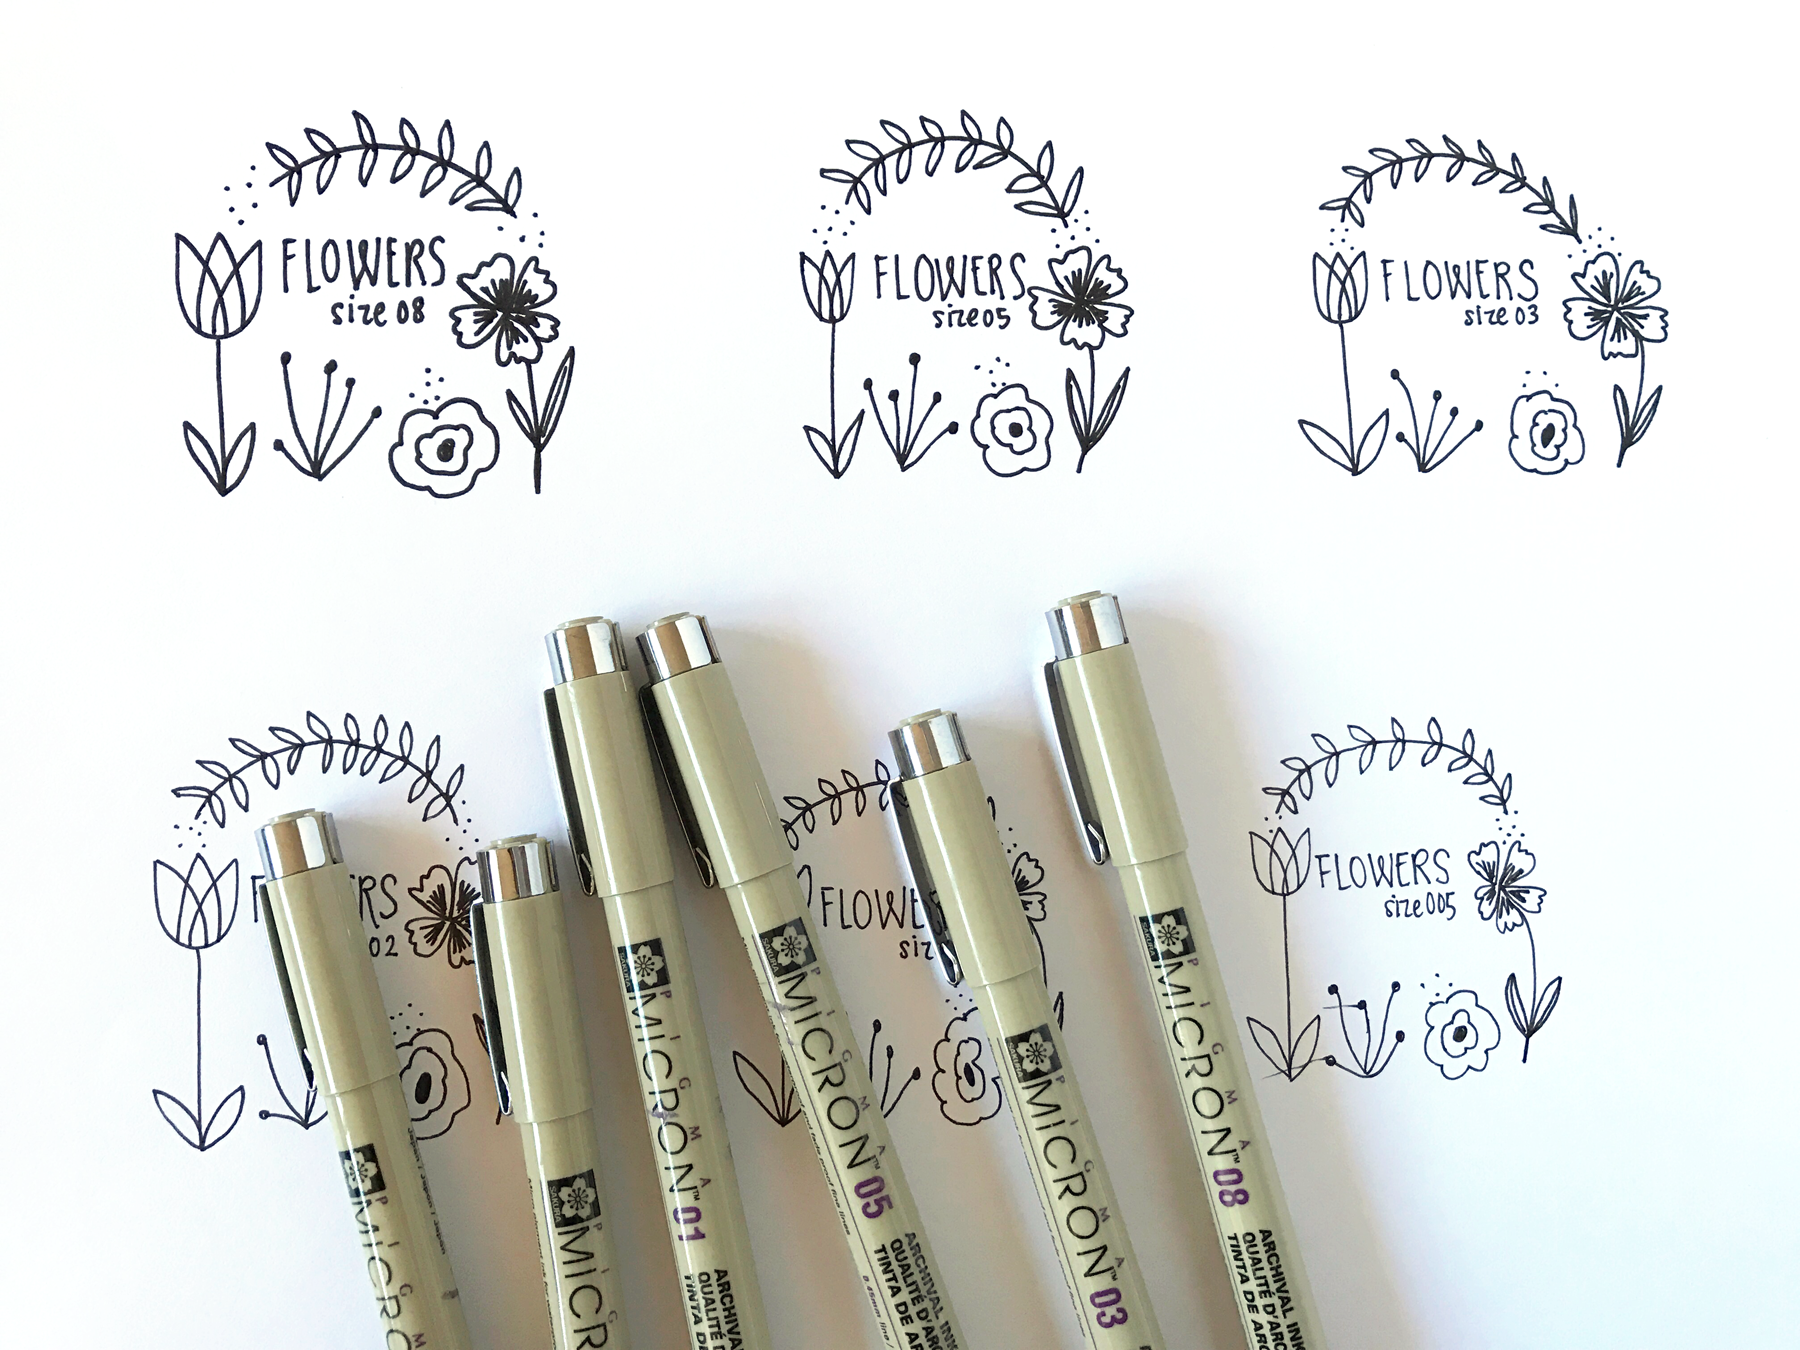
For comparison purposes, here is a similar drawing using six different pen tip sizes (005 is smallest, 08 is thickest):


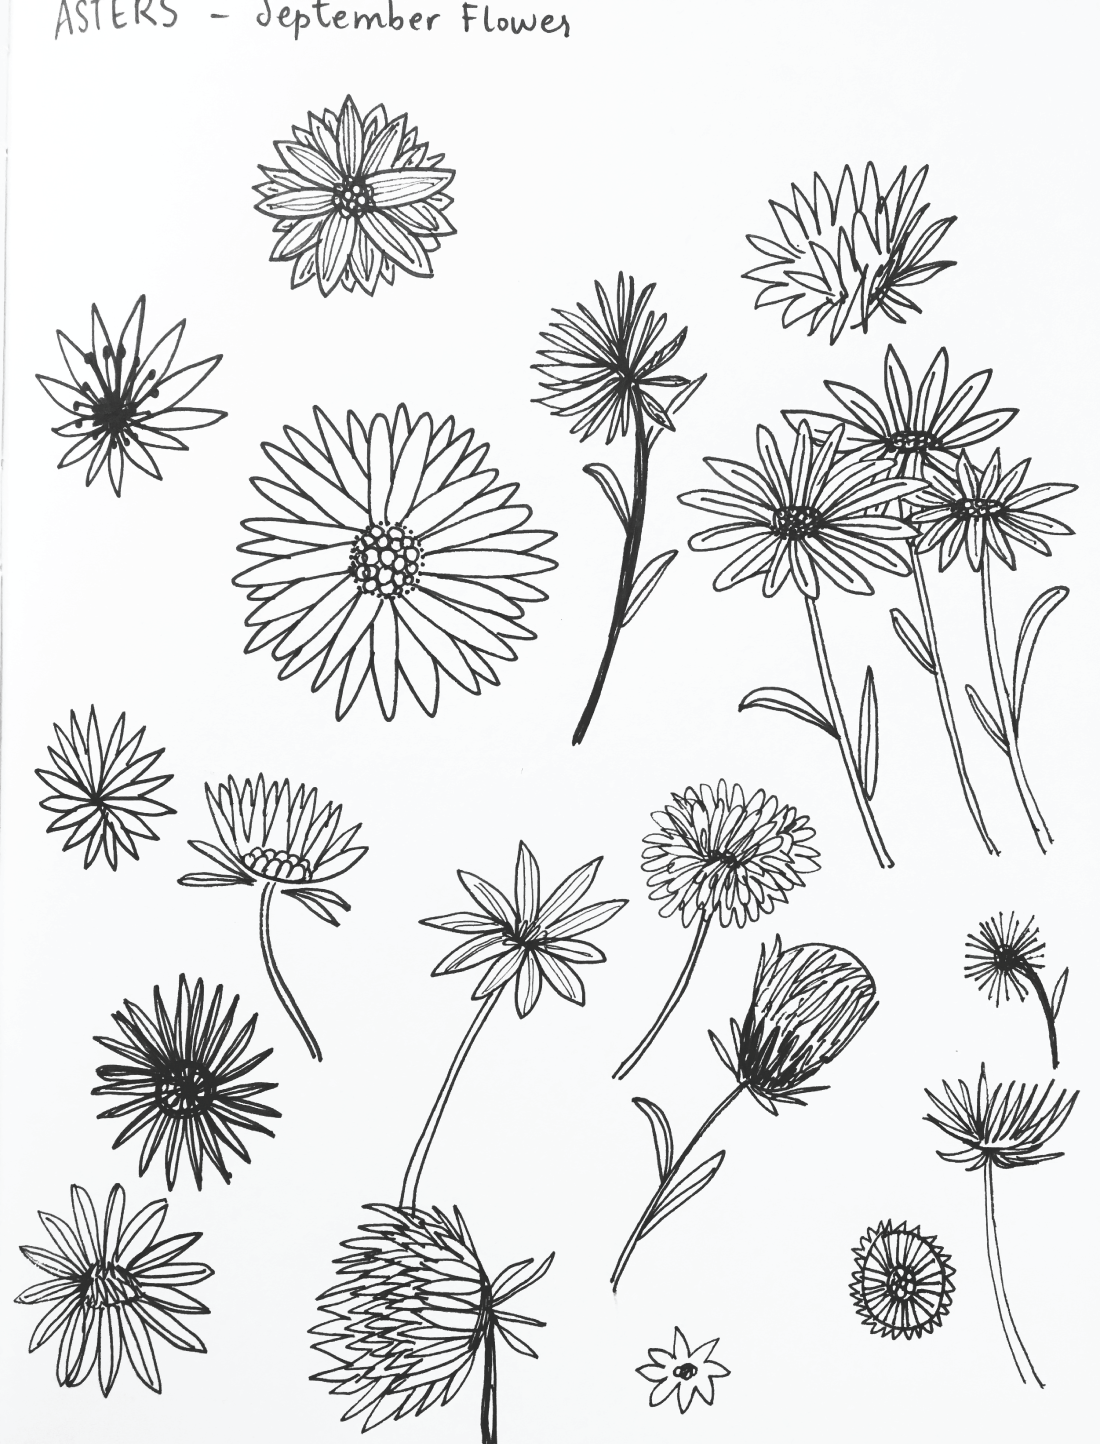
Illustration: Aster Flowers
I'm going to sing Lisa Congdon's praises again. I am so happy I discovered both her and Creativebug because she is teaching me so much as I continue my online learning addiction. Her approachable style, encouragement to practice regularly, and reminders that I shouldn't be aiming for perfection are what make her an ideal teacher in my book. Not to mention: her work is really great.
In addition to her 31 Things To Draw Course, Lisa has a Drawing and Illustration Basics class which I'm going through at the same time and feel like a whole world has been opened to me. A world of drawing. Something I never thought I could do...but I'm doing it. And yeah, I'm drawing at an elementary level but I feel like I'm improving each day and I'm completely enjoying myself, which is a good enough reason to continue.
Today I'm sharing the sketches and a bit of the process that I took to make this month's floral tech calendar. (If you didn't get yours yet, you can get it HERE.) Lisa recommends drawing things again and again and in as many variations as possible.
My final piece looks like this:
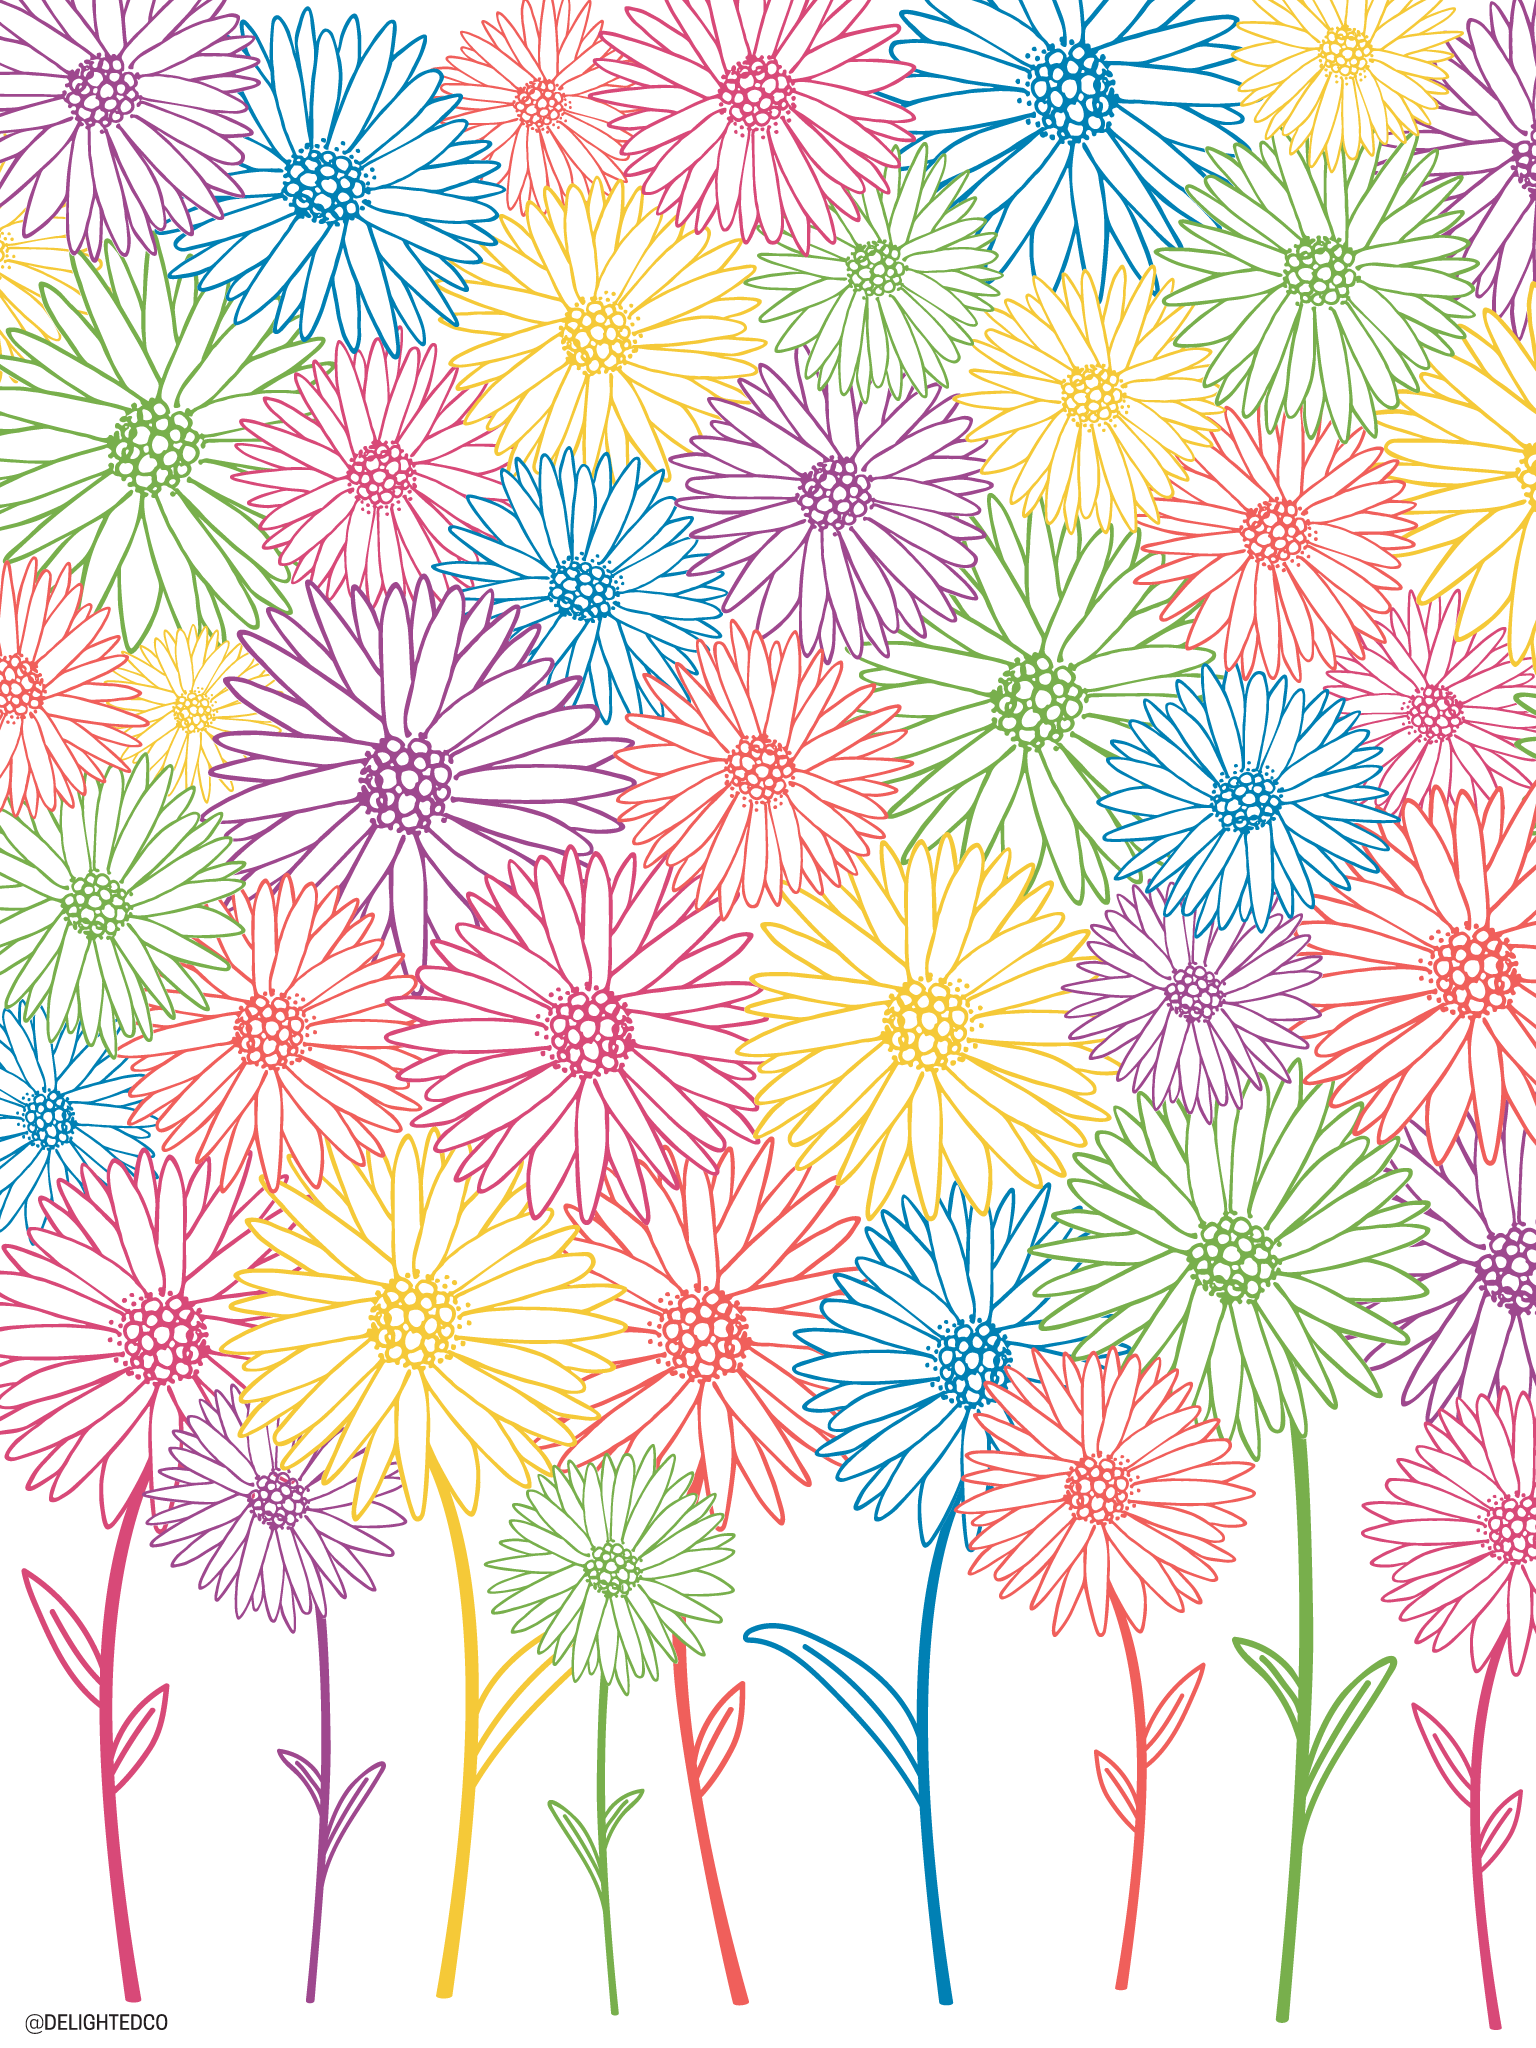
I started with sketching a page of asters.
Chose one, cropped and lightened it in Photoshop. Then brought it into Illustrator and used Live Trace and the pen tool to vectorize and smooth it out.

Then played with color, added stems, and built a page full of flowers. It was fun and I'm happy with the way it came out :)

Illustration: Teacups
Teacup sketches becoming vectors. I used pen and paper, then brought into Photoshop to clean up and then into Illustrator using Live Trace.


