Peonies and Limes Centerpiece DIY

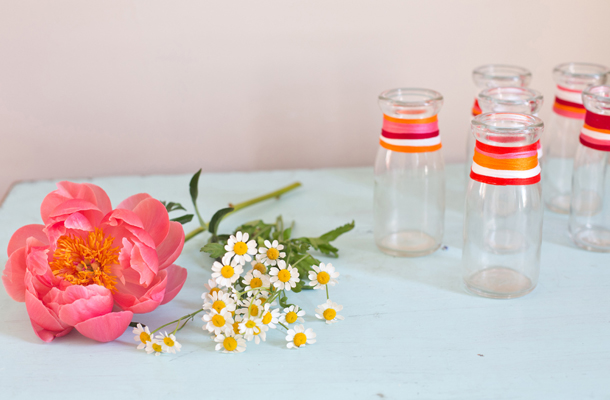
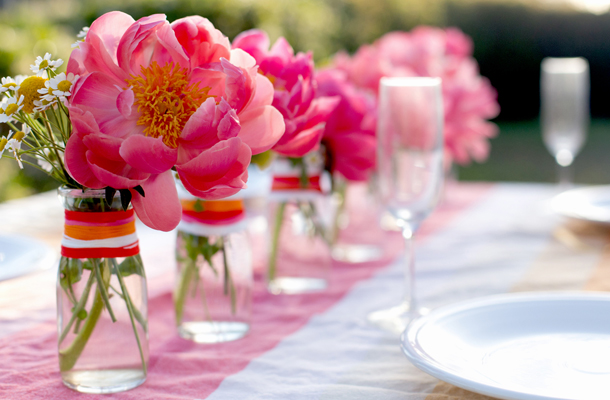
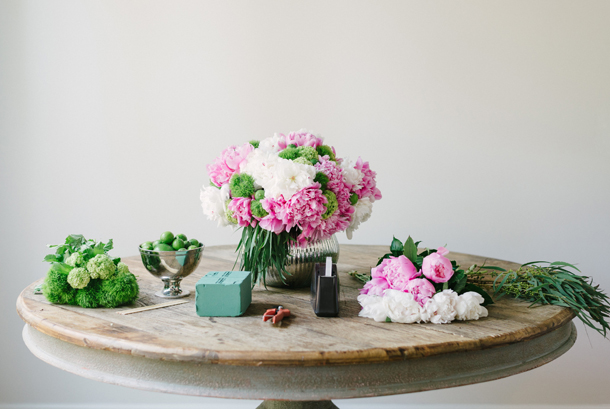
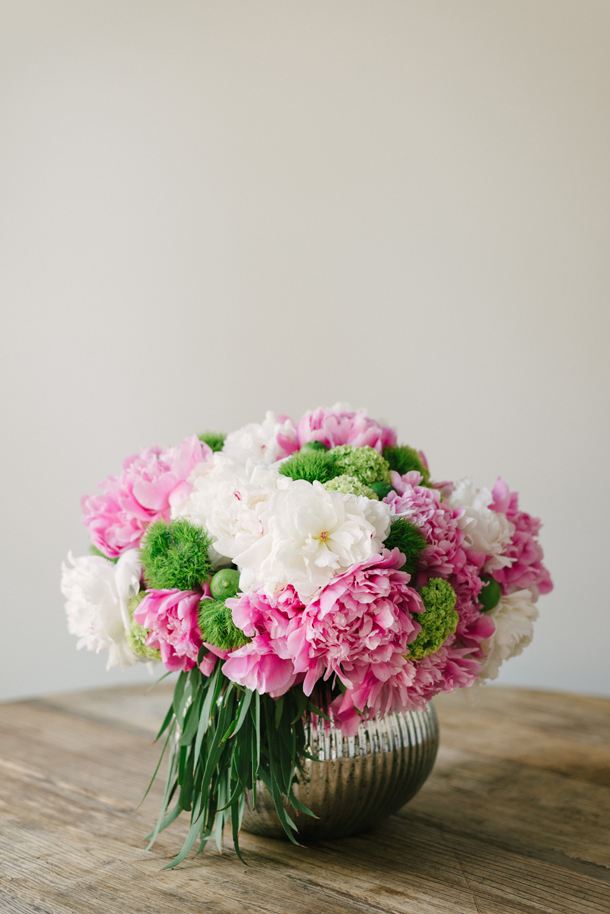
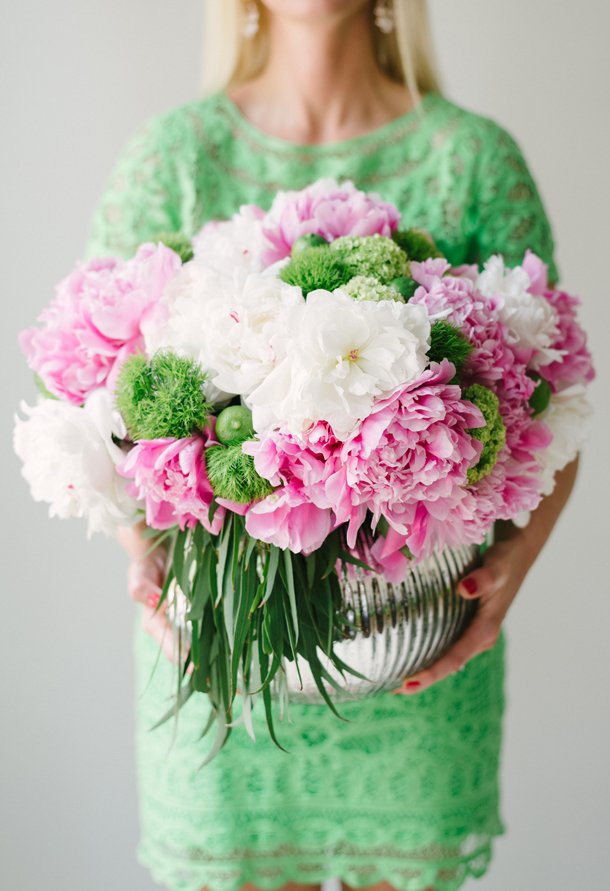
The stylish Mandy Kellogg Rye of Waiting on Martha created the most gorgeous centerpiece of peonies, key limes, and greenery for the summer issue of Delighted. Follow the step-by-step instructions below to make your own statement piece for your next event.

Follow Waiting on Martha on Facebook, Twitter, Instagram, and Pinterest
Photos by Rustic White Photography
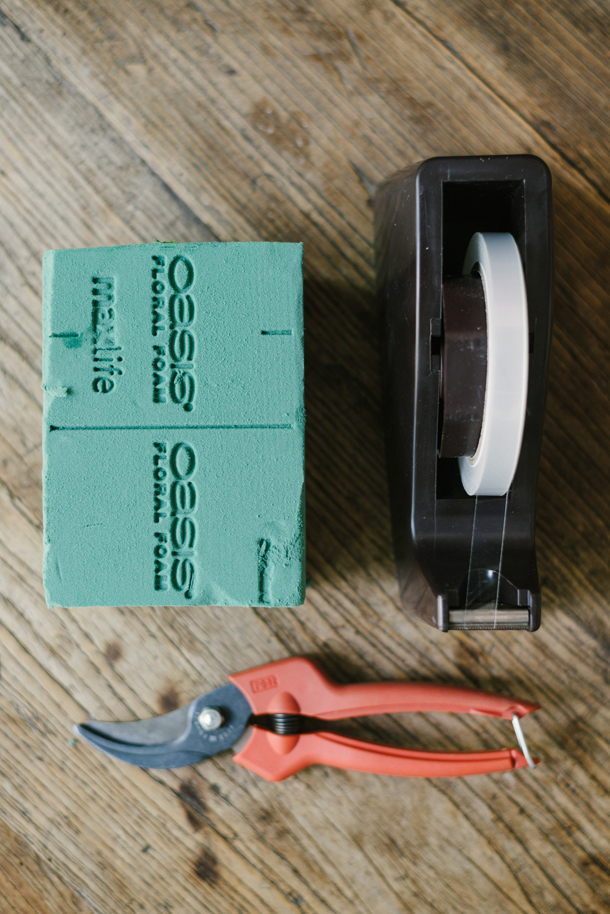
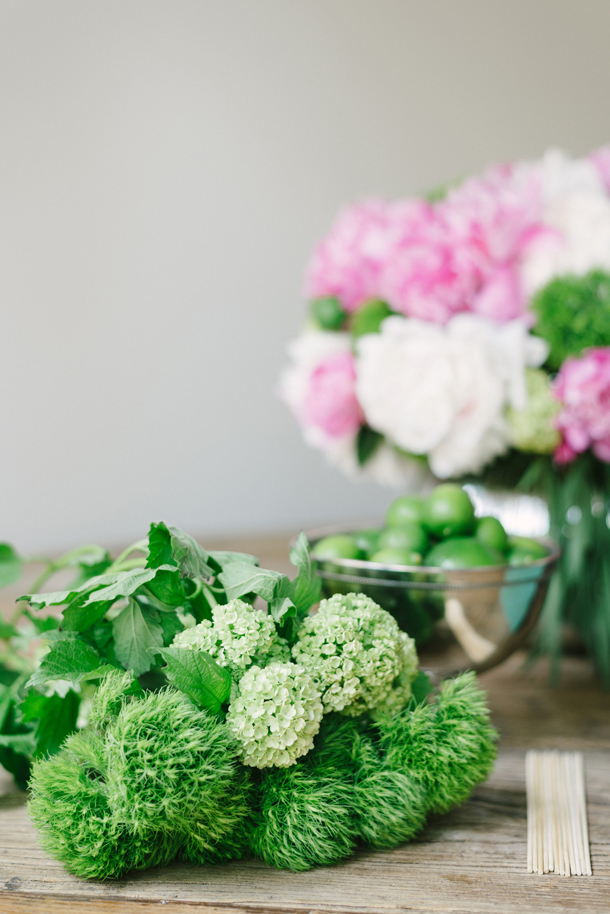


SUPPLIES
Peonies
Euca Willow
Greeny Dianthus Barb
Viumum Opulus
Key Limes
Tape
Floral Scissors
Foam Oasis Bricks or Individual Vases
Skewers or Plant Stakes (kabob skewers from the grocery store work!)
Large Vase (Pottery Barn's Whittier Mercury Glass Vase is used here)

STEPS
1. Fill the vase with warm water. Warm water helps to speed along the blooming process which helps if your peonies are not yet open.
2. Apply tape to the top of your vase in a large criss-cross pattern. If you are using a smaller vase, this step isn't necessary.
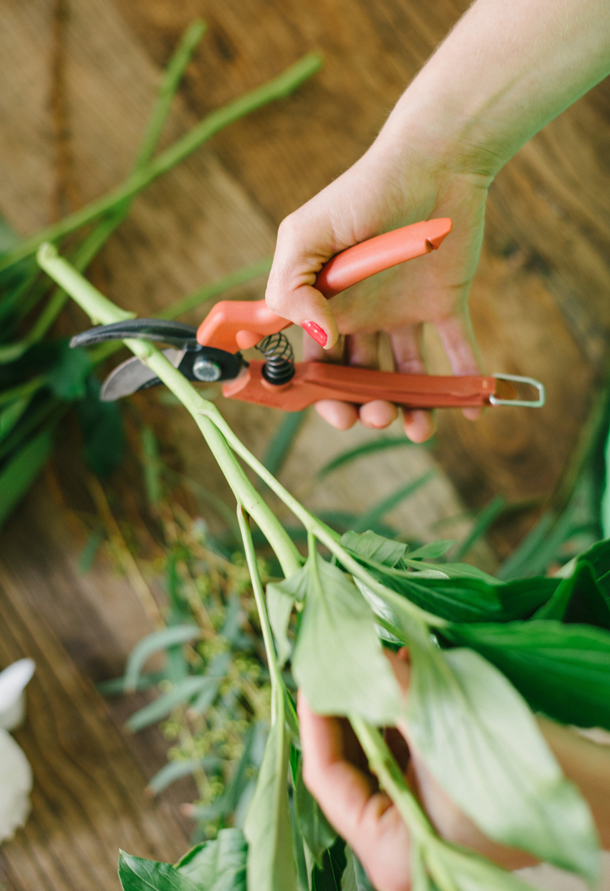
3. Trim the leaves off of the peonies, only leaving a few at the top of the flower. Then trim the height of the peonies to fit your vase size. You want them to fill the vase as evenly as possible. When cutting flowers, always cut on a 45-degree angle and above the nodes or joints.
4. Place peonies evenly into the criss-cross tape pattern on your vase.
5. Trim the dianthus and viumum opulus and begin placing into the holes between the peonies. The stems of the viumum opulus may not touch the water, so you can either fill individual vessels full of water for these or soak your foam oasis brick in water and position it high enough in the vase to allow the stems to reach it.
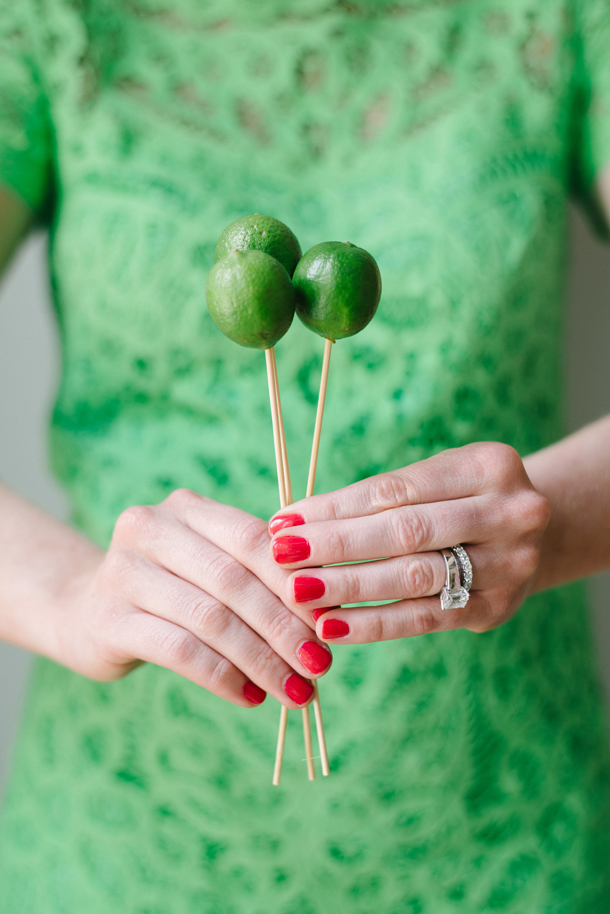
6. Skewer the limes onto the skewers or plant stakes and place into the vase through the arrangement.
7. Cut 1-2 stems of euca willow, then carefully lift the peonies and insert them into the front of the vase.

Note: Depending on how open your peonies are, this arrangement should last 4-8 days.

Colorful Summer Centerpiece DIY

Create these cheerful, striped centerpieces with just a few supplies. The finished product will make a darling addition to your next outdoor party table setting. Thank you to Stacey of The Sunday Sparkle for the tutorial and photos! See the full feature in the summer issue of Delighted.

Follow The Sunday Sparkle on Facebook and Pinterest

SUPPLIES
Mod Podge
Paint Brush
Glass Bottles (try these from Shop Sweet Lulu)
Embroidery Twine (from you local craft store)

DIRECTIONS
1. With your paintbrush, add a thin coat of mod podge to the glass surface.
 2. Cut a long strand of twine in your desired color. The length depends on how wide and how think you want your stripe. You can always add or cut your strand.
3. Place strand end in your glue, press down with your finger. Begin wrapping around the bottle, making sure your strands lay right next to each other to create a smooth look.
4. Finish your strand by adding a bit more glue to the end and press down firmly for a few seconds. 
5. Continue the process till you are finished and allow the glue to set before adding flowers.
6. Add as many colors as you desire, starting and ending the wrapping process in the same way.

Note: The twine can be reused for another project by carefully removing it from the glass bottle. Then soak the glass bottles and scrub off the mod podge glue. 

Sweet Corn Ice Cream

Here's a tasty treat for your summer sweet tooth: Sweet Corn Ice Cream with Kettle Corn Crumble. What a great combination, right? Thanks to Bonnie of plate|craft for the creative and delicious recipe. See the feature in the summer issue of Delighted!


INGREDIENTS
For the ice cream:
2 cups whole milk
2 cups heavy cream
4 ears fresh corn or 1 bag frozen
1 vanilla bean
½ teaspoon salt
¾ cup sugar
6 egg yolks

For the crumble:
4 cups Kettle Corn, divided
½ cup rolled oats
1 cup all-purpose flour
1 cup brown sugar
1 cup butter, frozen

DIRECTIONS
For the ice cream:
Combine the whole milk and heavy cream in a heavy bottomed, medium pot. If using fresh corn, cut the kernels from the cob. Add kernels and cobs to the pot. Split the vanilla bean down the middle and scrape the seeds from the middle with a sharp knife. Add vanilla bean seeds and pods to the pot as well. Bring to a boil. Remove from the heat and bring to room temperature. Remove the vanilla bean pods and corn cobs. Puree the mixture in the blender and strain through a fine mesh sieve. Return to the stove over medium heat until small bubbles form on the surface. Remove from heat.

In the meantime, whisk the egg yolks with the sugar and salt. Add 1 cup of the hot milk mixture to the egg mixture, pouring slowing and whisking quickly. This will temper the eggs. Add the egg mixture back into the milk mixture, again pouring slowly and whisking quickly.

Prepare an ice bath by placing ice cubes and cold water in a large mixing bowl. Secure a smaller mixing bowl in the ice. Return the pot to the stove over medium heat and cook until the mixture thickens enough to coat the back of a spoon. Remove from heat and pour mixture into the bowl prepped in the ice bath. Chill in the refrigerator and process in an ice cream maker according to the manufacturer’s instructions. Freeze until hard.

For the crumble:
Preheat the oven to 375 degrees F. Place 2 cups of Kettle Corn in a large mixing bowl and lightly crush. Add rolled oats, flour and sugar. Mix to combine.

Shred the frozen butter with a box grater. Add to Kettle Corn mixture and toss to combine, slightly working the butter into the dry ingredients. Spread the mixture on a parchment lined baking sheet. Bake for 10-12 minute, or until the butter melts and the mixture become lightly golden.

Remove from the oven and toss ingredients to recombine. Bake for another 10-12 minutes, or until golden brown. The mixture should still seem wet and buttery.

Remove from the oven and add remaining 2 cups of Kettle Corn. Toss to combine and allow to cool. Once cool, break up larger pieces to make the crumble.

Serve with ice cream.

Follow Bonnie on Instagram

Marinated Salmon Wraps

These savory wraps are fresh and flavorful, brought to you by Ainhoa Vega Bayo of A Little Bite of Everything. See the feature in the spring issue of Delighted.


INGREDIENTS
1/2 lb marinated salmon (recipe below)
Arugula or preferred greens
2 tablespoons sour cream
Salt, pepper and olive oil
Lavash bread

For the Salmon
1 cup kosher salt
1/2 cup white sugar
Lemon zest
Orange zest

DIRECTIONS
Salmon
Cover the salmon with the salt, sugar, lemon and orange zest and marinate all night. Remove all the salt and sugar, and rub with a clean damp kitchen towel to remove all the remaining excess. Cut the salmon in thin slices.

Wrap
On the open lavash bread, layer the arugula or preferred greens and thin slices of marinated salmon. Add a dab of sour cream on top and finish it off with salt, pepper, and extra virgin olive oil. Wrap and serve immediately.

Follow A Little Bite of Everything
Blog | Instagram | Pinterest | Twitter

Floral Jewelry DIY

Here's a creative idea from the talented Madeline Trait of

By Madeline Trait

. A great option for giving a friend flowers on May Day (which is next Wednesday!). See the feature in the spring issue of

Delighted

.

SUPPLIES

Flowers  Choose one to two larger blooms and 2-3 smaller flowers or foliage. Be creative and add dried seed pods, feathers, etc.

Glue  Oasis floral adhesive and hot glue

Ribbon  Approximately 1 yard

Heavy Fabric  Canvas or felt should work. You want something that's going to be stiff and hold its shape.

DIRECTIONS

On your fabric, draw a semi-circle shape that is 6-7" wide and not taller than 4". This will be the backing. Try it around your own neck or wrist to be sure it fits well. It should sit just under your collarbone. 

Cut your ribbon into two and tie it to the skinny ends of your fabric. A square not should do. To make sure it holds, add a drop of hot glue to the underside of the ribbon where it touches your fabric backing. This will be your "chain" for your necklace. You can also make the ribbon longer and make a belt out of it or a dog collar for a K-9 friend.

Once you have your backing done, start laying out your flowers and other items on your backing. When you are happy with how it looks, start gluing. Note: floral adhesive can get a bit messy. Try using a toothpick or a small applicator to add glue to your flowers instead of the tube. As you glue the flowers and pods on the fabric, try it on every-once-in-a-while so to ensure it falls correctly on your chest.

Give the flowers a quick spray with water, wrap and deliver! Depending on the flowers you use, your necklace should last a day. If you use flowers that dry nicely, the recipient can dry the piece and wear it all the time! 

Concept and Styling by

Madeline Trait

Photos by

Caroline Winata

Buckwheat Crepes with Rhubarb & Orange Compote


Recipe & Photos by Kathryn Westmore of London Bakes
See full feature in Delighted's Spring Issue

INGREDIENTS
For the Compote
3/4 lb (400 g) rhubarb, chopped into ½ inch pieces
Zest of 1 orange
Juice of ½ an orange
1/4 cup unrefined granulated sugar

Crepes
1 egg
1/2 cup + 2 tablespoons milk
1/2 cup (55 g) buckwheat flour
1 tablespoon of butter
Crème fraîche, to serve

DIRECTIONS
Compote 
1. Put all the ingredients in a pan over a medium-low heat and cook for 20-30 minutes until the rhubarb is soft but still has a little bite to it.  Set aside until needed.
 
Crepes 
1. Whisk together the egg and the milk in a large bowl until combined.  
2. Whisk in the flour until you have a smooth batter. Leave to stand in the fridge for at least 2 hours.
3. When you’re ready to make the crêpes, heat a little of the butter in a small skillet over a medium heat.
4. Give the batter a quick whisk and ladle a spoonful of it into the hot pan. Quickly roll it around to cover the whole pan and cook until browned (about a minute). Flip the crepe and cook the other side. Continue to cook the rest of the batter. You can keep the cooked crêpes in a slightly warm oven to keep them from going cold.
5. Spoon a generous tablespoon of the compote–either warm or cold depending on your preference–into the middle of a crêpe and wrap.
6. Serve with a dollop of crème fraîche and a scattering of orange zest.