


For your viewing pleasure: the sixth issue of Delighted. Enjoy!! xo
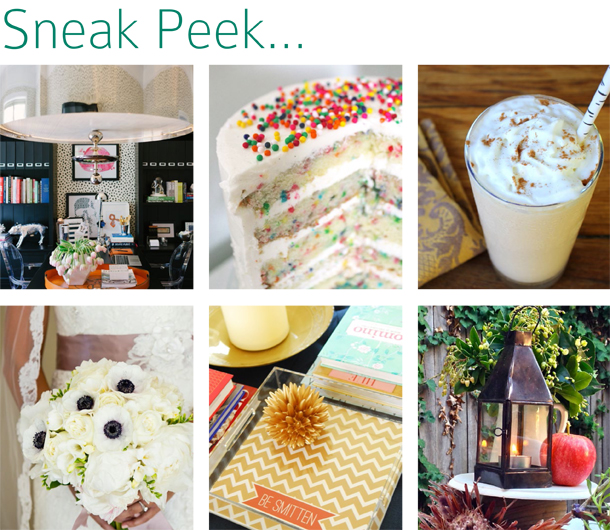
Coming Soon...
The newest issue of Delighted will be out this week! Here's a little peek of what's to come.
A Sweet and Simple Brunch
Here it is: a little brunch inspiration and tips for keeping it sweet and simple.
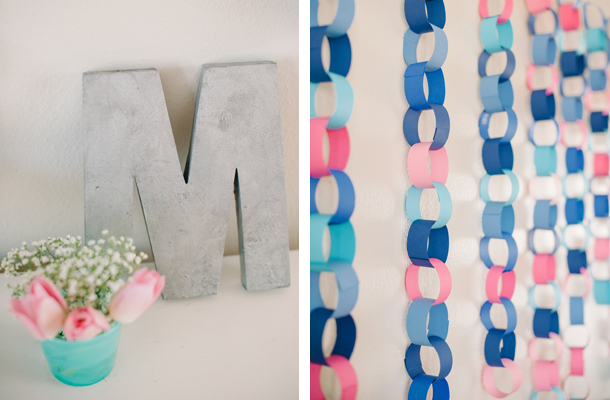
Decor
Why not choose a color or two and make that your theme? Colored paper chains will make a fun and festive backdrop for your buffet table. And if you have kids, this is something they would love to help with! For centerpieces, find baskets or containers around your house and fill them with whatever fresh flowers are available at your local farmer's market or grocer. If you don't have colored plates (or even if you do), consider using
, in a color other than white, to add some brightness to each place setting. And to style a glass serving piece, tape colored paper to the bottom of the glass for a little visual interest (see the tiered platter below).
Menu
Oatmeal
Yogurt Parfaits
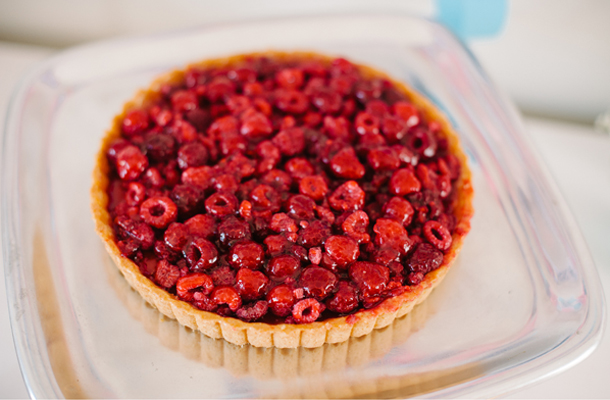
Raspberry Tart
Berry Muffins
Spinach Salad
Coffee and OJ
To cut down on prep time, pick a menu that doesn't keep you in the kitchen too long. For instance, my berry muffins are made with a store bought muffin mix. I added a blackberry on top of each to give them a little personality. The raspberry tart? Trader Joe's. And yogurt parfaits are just a mix of yogurt, granola and fresh fruit.
Voila! A cheerful weekend brunch set-up for a casual gathering with friends, or even a wedding or baby shower. Have fun!
Photos by


From the Desk of: Sarah of Hello Monday
Creative duo Sarah Kim-Puangsuvan and Lindsay Pruitt opened their design studio,
, earlier this year. Combining their talents, they offer creative branding, website design and marketing services. Today we get a glimpse into Sarah's office and a chance to find out a bit about her work style. See the full feature in the
of Delighted.
Follow Hello Monday:
|
|
|

Can you tell us a little bit about what you do?
My design partner, Lindsay and I started a graphic and web design studio called
Creative back in January. We are a full-service design studio with projects ranging from branding/ print/marketing to web and blog design. I create all the design aesthetics for clients and Lindsay is the web coding guru and makes everything come to life!
What does a typical work day look like for you?
My typical work day starts with me waking up around 8 or 9 in the morning and going for a run (if the weather permits). Then I make myself a big green smoothie for breakfast and take about 30 minutes to check and reply to emails. Lindsay and I get on Skype to chat or have a video conference while working on our client's projects throughout the day. Usually, I am able to finish up at my desk around 5 or 6pm and I try not to check email or work late once my husband comes home for work. It's still a fine line I've been working on ever since we started Hello Monday. When our work load gets busy and when you work at the comforts of your own home, sometimes it's just difficult to step away from desk and it's easy for me to work very late into the night. My creative juices tend to kick in more at night time too!

When setting-up your workspace, what was most important?
I would say the most important factor was setting up my desk in a room with lots of natural light. Luckily, the room we use for the office gets tons of light which is not only great for taking photos, but also makes me feel more energized. Another important factor is having a clutter-free work area. I found a beautiful white desk from CB2 that has one slim drawer where I can store my notebooks and wacom tablet when I'm not using it. My husband is the complete opposite of me and it drives me nuts when he needs to use my desk. I know, a bit possessive but there's just something about a clean, clutter-free workspace that feeds positive energy to my workflow!

What is your favorite thing about your workspace?
All the white, clutter-free workspace! And my giant iMac screen. It takes workflow to a whole new level!
Is there anything you would change about your workspace? If so, what?
Most definitely! We knew when we moved into our current apartment that it would not be a long-term place. We have been moving around every year and because of that, I didn’t have much motivation to completely decorate my office the way I wanted. We recently found out that we will be moving to Seattle and it will most likely be a permanent place for us. So I'm definitely looking forward to hanging framed wall art. And I've always wanted to put up a wall collage of inspiring images. Of course, I'd also love to add a white leather Eames lounge chair to my office…I am working on that!


What tips can you share for keeping yourself as efficient as possible?
If my office is cluttered, I get distracted and it hinders me from finding books, objects, supplies, or whatever I'm needing at a particular time. By having everything organized, labeled, and structured, I find that my creative process flows so much more efficiently. I purchase storage boxes from Ikea that are neatly labeled and used for storing all my supplies. Also my Ikea bookshelves are a life saver! I can't live without my design books so it's nice to have all my resource books within easy reach. I also collect tea tins and use them to hold markers and pens. Old stationery boxes also have helped me store stationery cards, stamps and business cards in a more organized way. I find the key is making sure everything is easy to find!

What tips can you share for balancing work and personal life?
I'm still working on this one…when my husband comes home from work, he me to be off the computer so that we can spend some quality time without any distractions. I make an effort to designate "office hours" for myself and clients. I give myself an hour lunch break and also mini breaks within 9-6pm to walk our dogs. For me, working from home can take a bit more discipline to strike that work and personal life balance. I would say the best tips are to be disciplined, give yourself set work hours, and dressing up as if you are actually going to work at an office helps a lot! It's all about turning your mindset to "work mode".
When not at your desk, you can be found...
Either meeting friends, spending time with my husband, going for a run, or in the kitchen cooking!
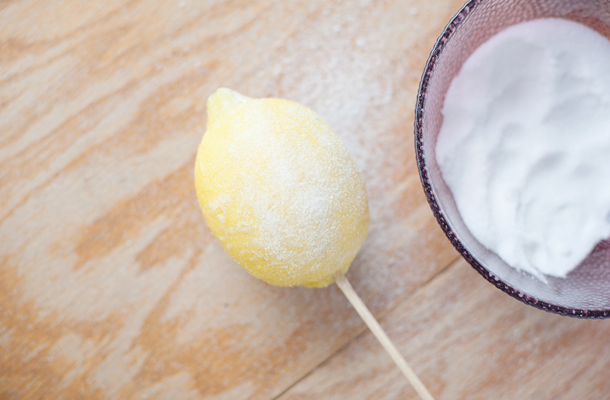
Sugared Fruit Centerpiece
Sugared fruit is a fresh, colorful and delicious way to incorporate nature's candy into your table setting this season. Use your favorite fruit and arrange them with fresh flowers, in a bowl, or on cake stands. The possibilities are endless with these sweet beauties, so get creative!
Designed by Darling and Daisy
Photos by Natalie Spencer Photography


SUPPLIES
Variety of fruit
Wooden skewers or long floral picks
Eggs
Basting brush
Extra-fine sugar
Waxed paper
Bowl or vase for display
Fresh flowers, optional
STEPS
1. Spear fruit with wooden skewers or floral picks.
2. Crack eggs and separate the whites from the yolks. Put the egg whites in a small bowl. If concerned about eating raw eggs, you may use powdered egg whites or 2-3 envelopes of unflavored gelatin.
3. Using a basting brush, coat your fruit with a thin layer of the egg whites.
4. With your fingers, lightly sprinkle sugar over the fruit, and rotate as you go. Continue to sprinkle and rotate, as the first few layers will dissolve into the egg whites. When the coating turns white, add extra sugar to a few spots to create a pretty frost-like look.
5. Let dry for 30-minutes on waxed paper.
6. Arrange dried sugared fruit in a bowl or vase. For an extra sweet centerpiece, add fruit to a floral arrangement or in various bowls along with flowers on your table!
7. Keep sugared fruit in a non-humid environment at room temperature and consume within 24-hours.
Home Finds: Jungle Chic

Curated by Emma Grace Hawtrey. See the full spread in the summer issue of Delighted.
Wooly Wood Throw, Donna Wilson
Throw Pillows, Anthropologie
Terrarium, ABJ Glassworks on Etsy
Elephant, Vivaterra
Organic Cotton Blanket, GYPSA on Etsy
Mosaic, New Ravenna
Candle, Izola
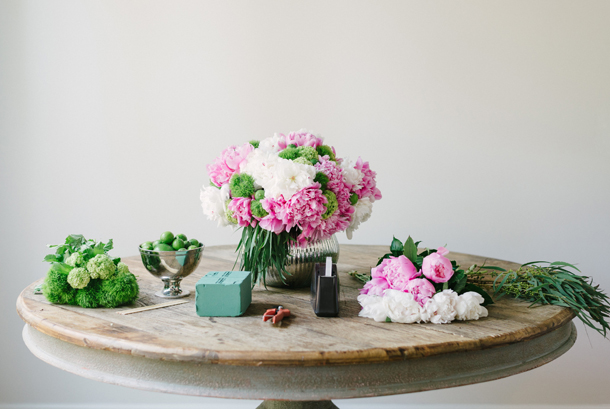
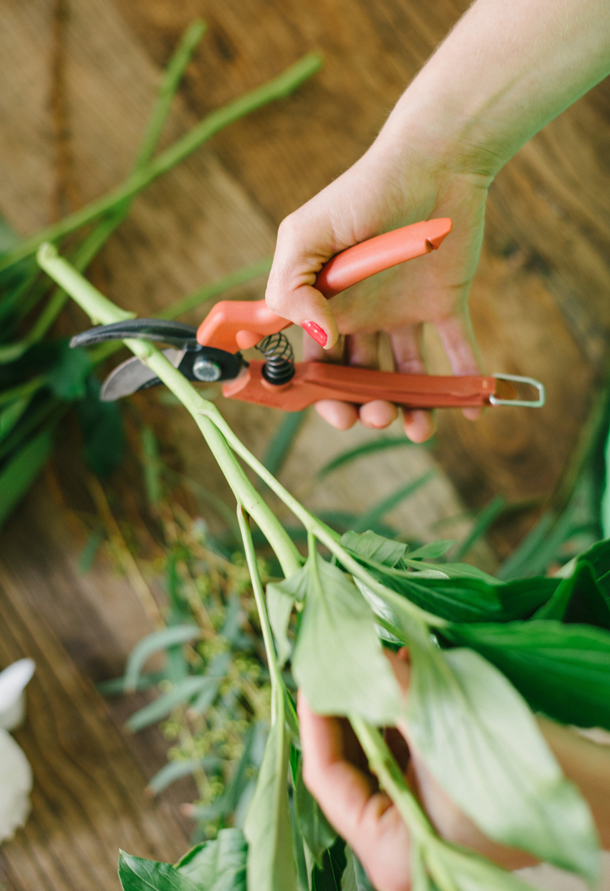
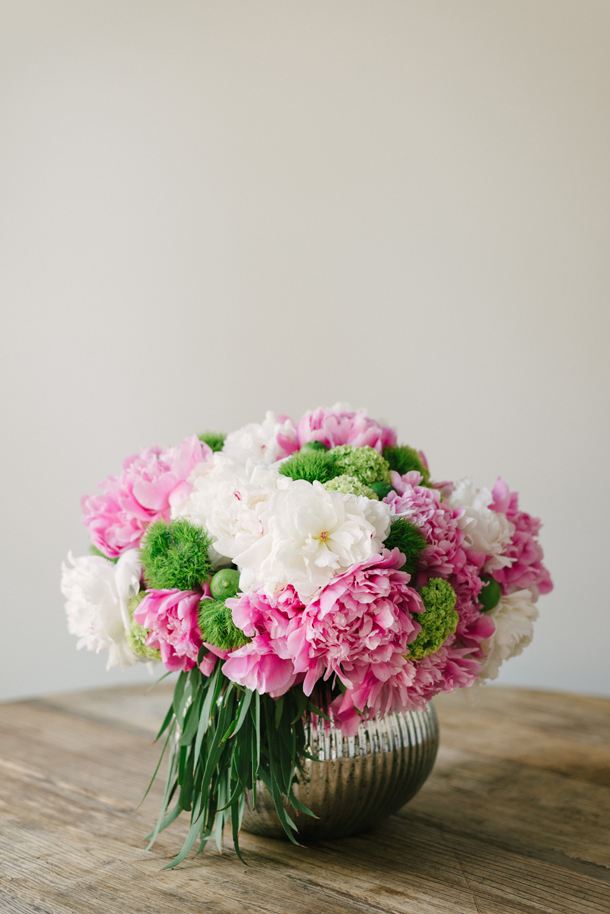
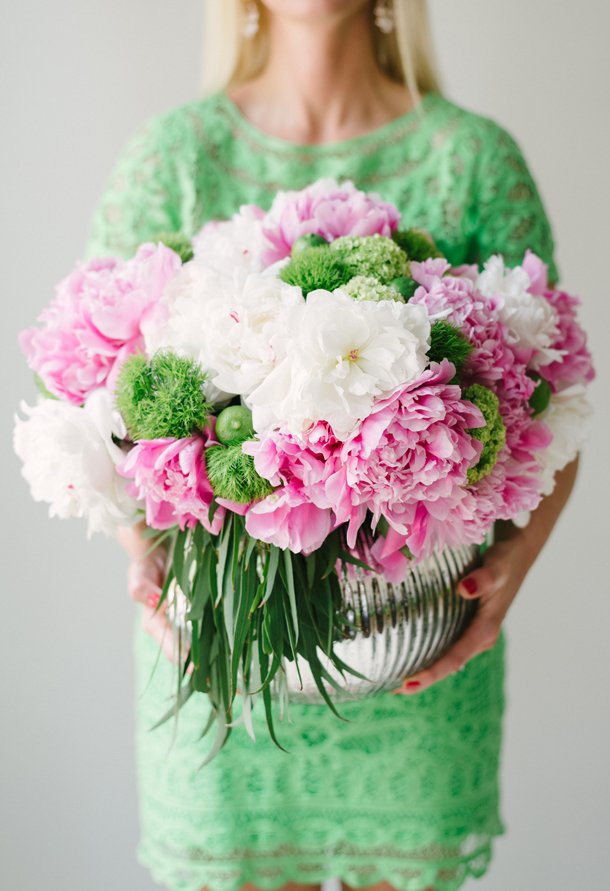
Peonies and Limes Centerpiece DIY
The stylish Mandy Kellogg Rye of Waiting on Martha created the most gorgeous centerpiece of peonies, key limes, and greenery for the summer issue of Delighted. Follow the step-by-step instructions below to make your own statement piece for your next event.
Follow Waiting on Martha on Facebook, Twitter, Instagram, and Pinterest
Photos by Rustic White Photography

SUPPLIES
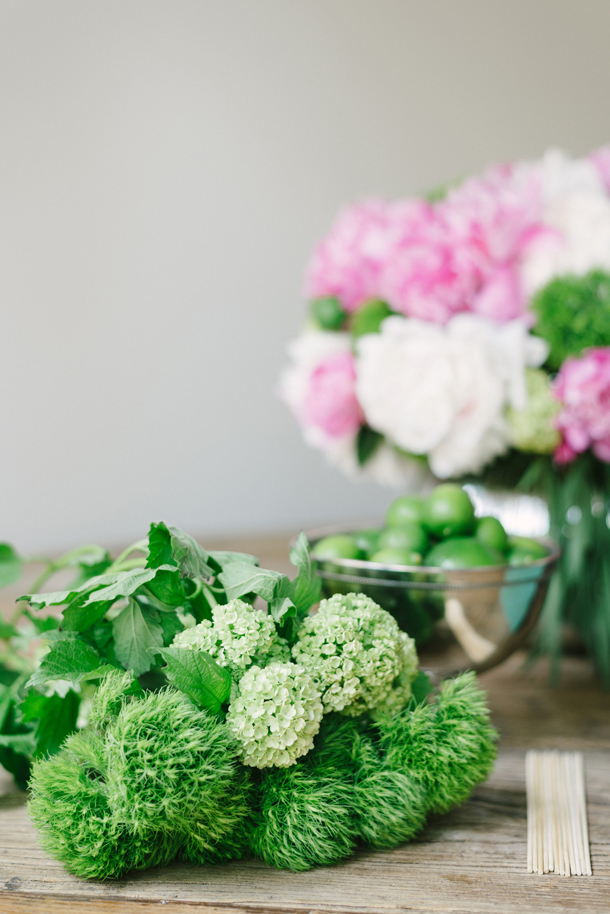
Peonies
Euca Willow
Greeny Dianthus Barb
Viumum Opulus
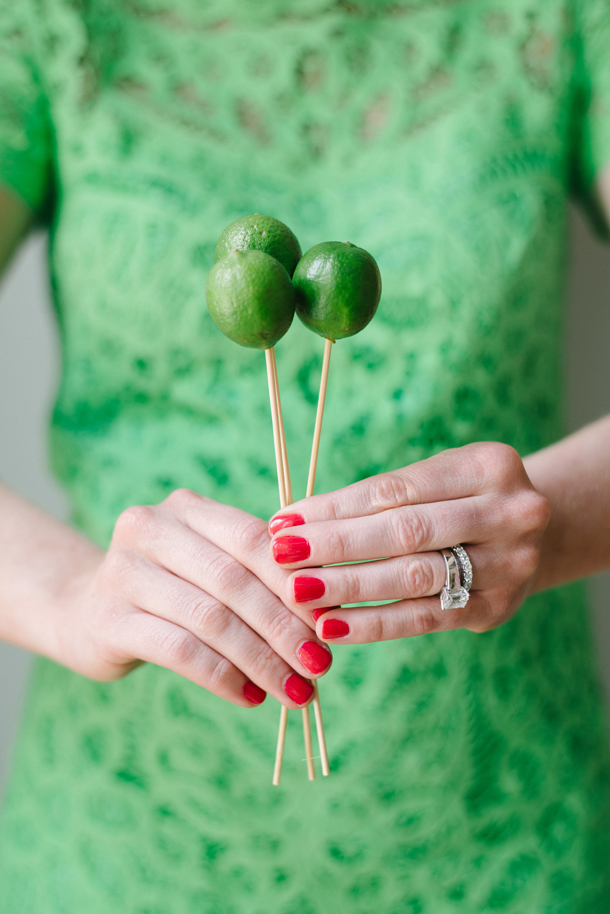
Key Limes
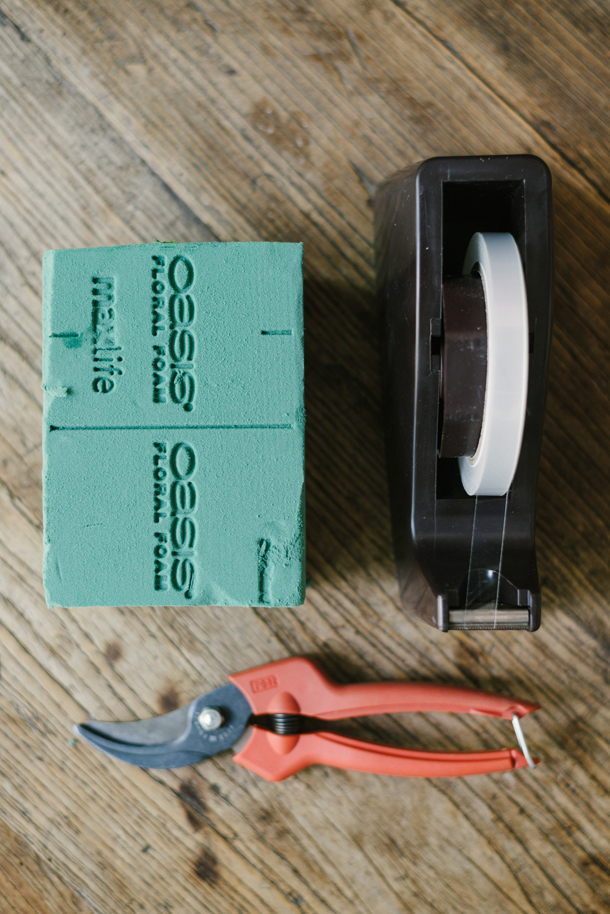
Tape
Floral Scissors
Foam Oasis Bricks or Individual Vases
Skewers or Plant Stakes (kabob skewers from the grocery store work!)
Large Vase (Pottery Barn's Whittier Mercury Glass Vase is used here)
STEPS
1. Fill the vase with warm water. Warm water helps to speed along the blooming process which helps if your peonies are not yet open.
2. Apply tape to the top of your vase in a large criss-cross pattern. If you are using a smaller vase, this step isn't necessary.
3. Trim the leaves off of the peonies, only leaving a few at the top of the flower. Then trim the height of the peonies to fit your vase size. You want them to fill the vase as evenly as possible. When cutting flowers, always cut on a 45-degree angle and above the nodes or joints.
4. Place peonies evenly into the criss-cross tape pattern on your vase.
5. Trim the dianthus and viumum opulus and begin placing into the holes between the peonies. The stems of the viumum opulus may not touch the water, so you can either fill individual vessels full of water for these or soak your foam oasis brick in water and position it high enough in the vase to allow the stems to reach it.
6. Skewer the limes onto the skewers or plant stakes and place into the vase through the arrangement.
7. Cut 1-2 stems of euca willow, then carefully lift the peonies and insert them into the front of the vase.
Note: Depending on how open your peonies are, this arrangement should last 4-8 days.
Follow Waiting on Martha on Facebook, Twitter, Instagram, and Pinterest
Photos by Rustic White Photography
SUPPLIES
Peonies
Euca Willow
Greeny Dianthus Barb
Viumum Opulus
Key Limes
Tape
Floral Scissors
Foam Oasis Bricks or Individual Vases
Skewers or Plant Stakes (kabob skewers from the grocery store work!)
Large Vase (Pottery Barn's Whittier Mercury Glass Vase is used here)
STEPS
1. Fill the vase with warm water. Warm water helps to speed along the blooming process which helps if your peonies are not yet open.
2. Apply tape to the top of your vase in a large criss-cross pattern. If you are using a smaller vase, this step isn't necessary.
3. Trim the leaves off of the peonies, only leaving a few at the top of the flower. Then trim the height of the peonies to fit your vase size. You want them to fill the vase as evenly as possible. When cutting flowers, always cut on a 45-degree angle and above the nodes or joints.
4. Place peonies evenly into the criss-cross tape pattern on your vase.
5. Trim the dianthus and viumum opulus and begin placing into the holes between the peonies. The stems of the viumum opulus may not touch the water, so you can either fill individual vessels full of water for these or soak your foam oasis brick in water and position it high enough in the vase to allow the stems to reach it.
6. Skewer the limes onto the skewers or plant stakes and place into the vase through the arrangement.
7. Cut 1-2 stems of euca willow, then carefully lift the peonies and insert them into the front of the vase.
Note: Depending on how open your peonies are, this arrangement should last 4-8 days.